OptimiDoc Cloud OptimiCapture and OptimiPrint Guide - Admin console
Xerox AltaLink
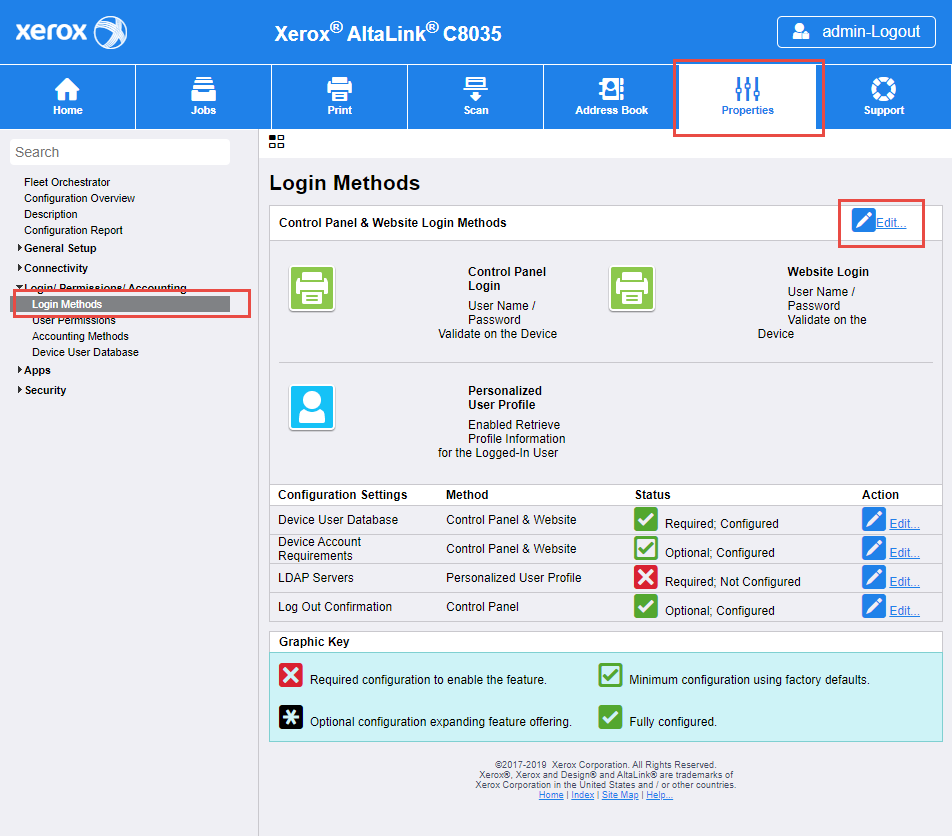
- Open the device web interface and login on the device as an administrator.
- Open the Properties section and then the Login methods tab.
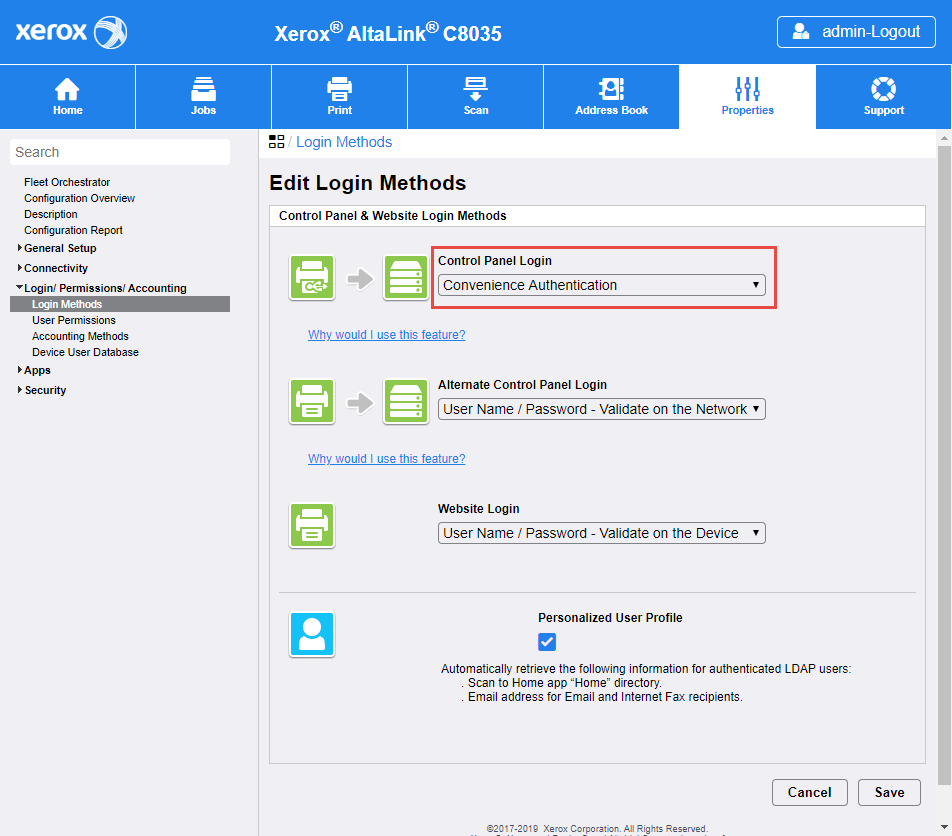
- Configure Control Panel Login to Convenience Authentication.
- Click Edit... Convenience authentication setup.
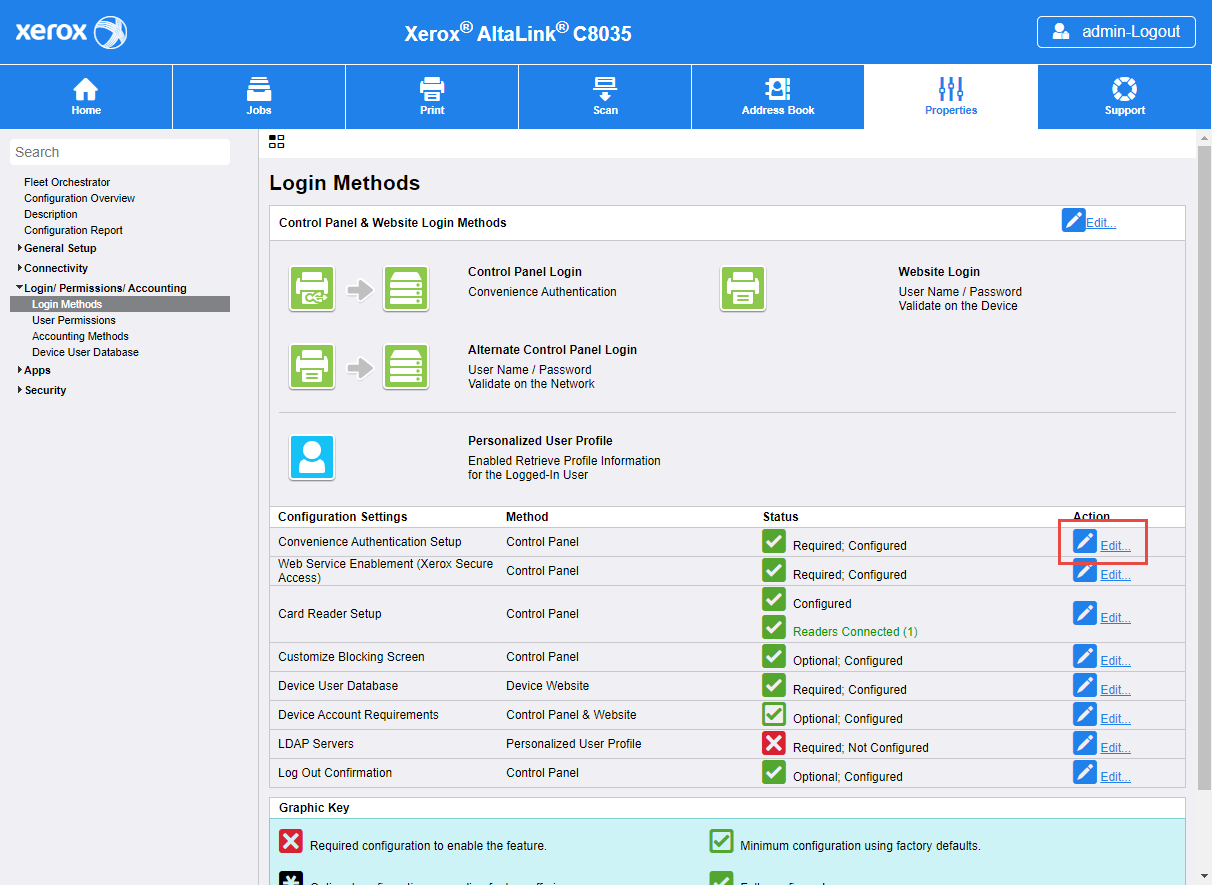
- Configure Convenience Authentication Setup:
- Server Communication
- Select IPv4 Address and enter IP address of OptimiDoc Cloud Node
- Enter to Path :"/XeroxAuthentication.asmx?ip=ENTER_IP_ADDRESS_OF_THE_DEVICE"
- Accounting Information
- Select Automatically apply Accounting Codes from the server.
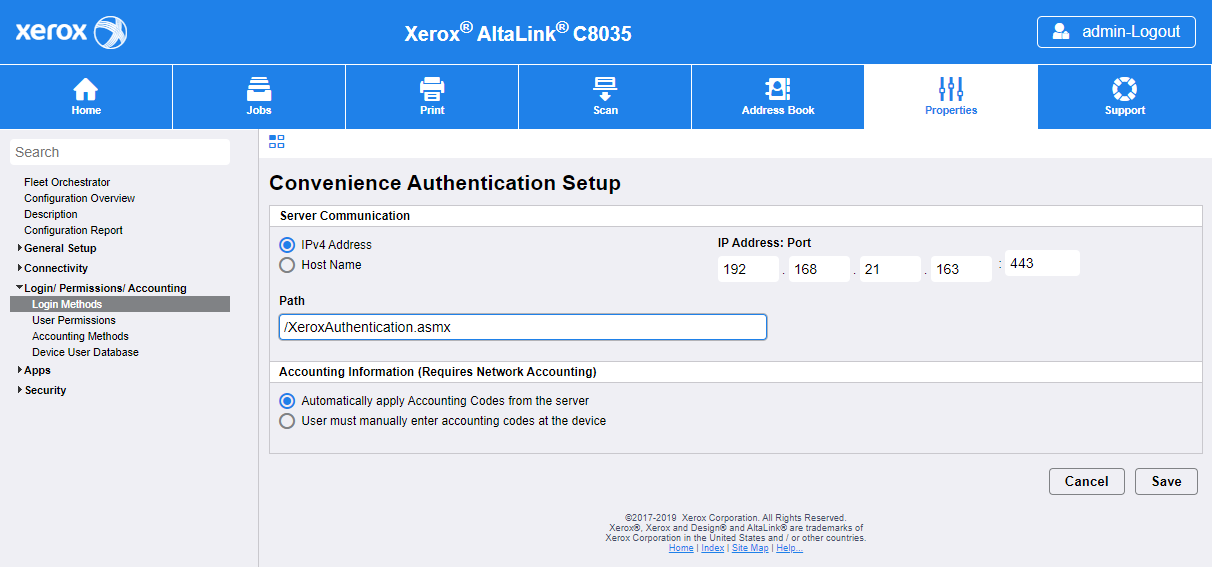
- Click on the Save button.
- Additionally, you can customize blocking screen in the section Customize Blocking Screen.
