Printer configuration on Windows workstation
This section describes how to add a printer on a Windows workstation which sends the documents to the OptimiDoc Pull print Spooler stored in OptimiDoc Cloud Node.
To configure the printer:
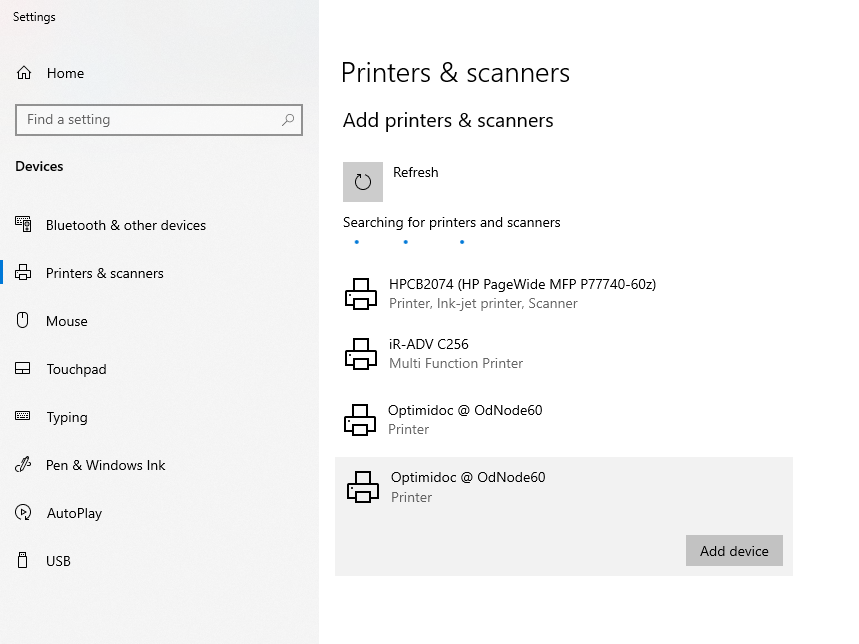
- Open Device and Printers from the Start menu (i.e. Start Menu > Settings > Devices > Printers & scanners) or from the Control Panel.
- Click on Add printer or scanner.

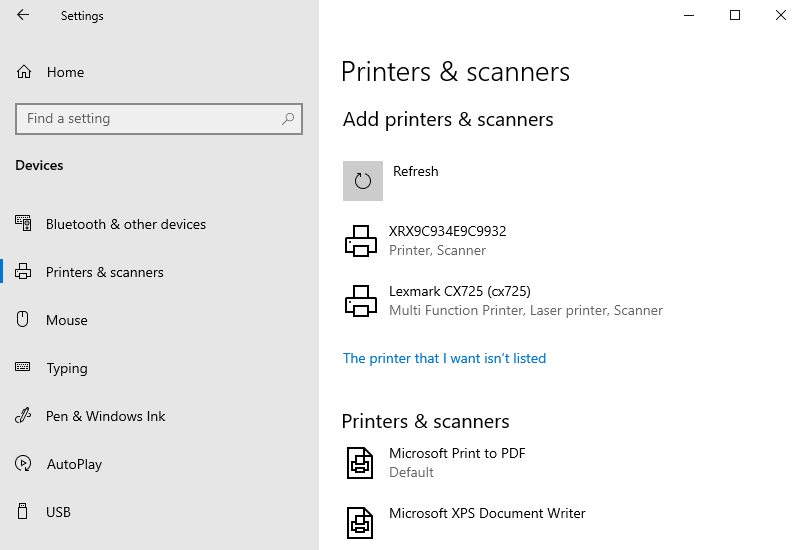
- As soon as the system tries to search for new printers and scanners, don't wait for the search to finish and click on The printer that I want isn't listed.
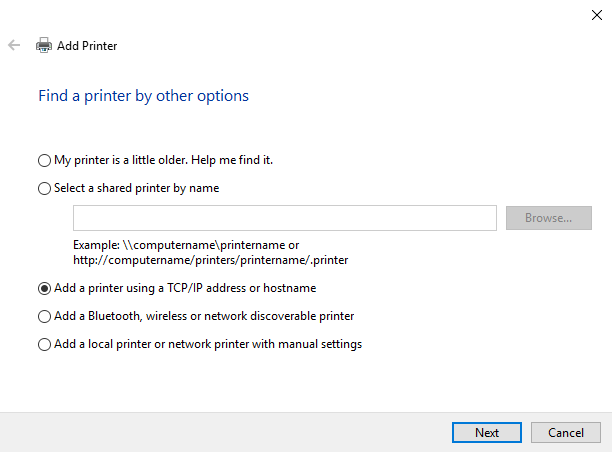
- In Add Printer dialog, check Add a printer using a TCP/IP address or hostname and then click Next.
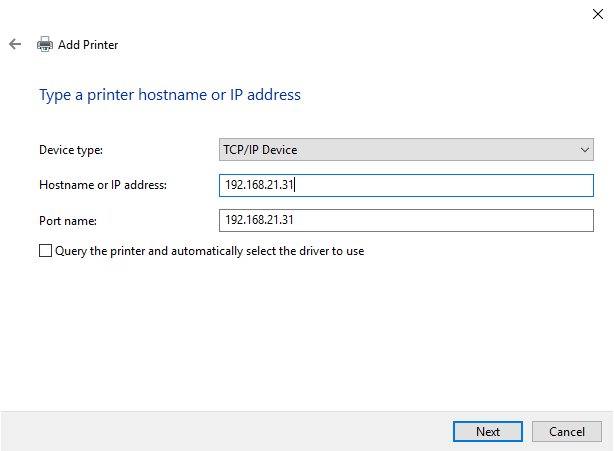
- Change Device type to TCP/IP device and enter the IP address of your OptimiDoc Cloud Node under Hostname field. Leave Port name predefined automatically or enter a custom port name.
Click on the Next button to continue.
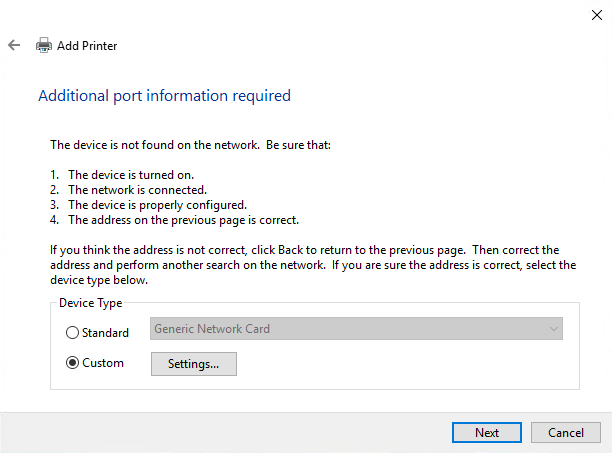
- Check Custom under Device Type and click on the Next button.
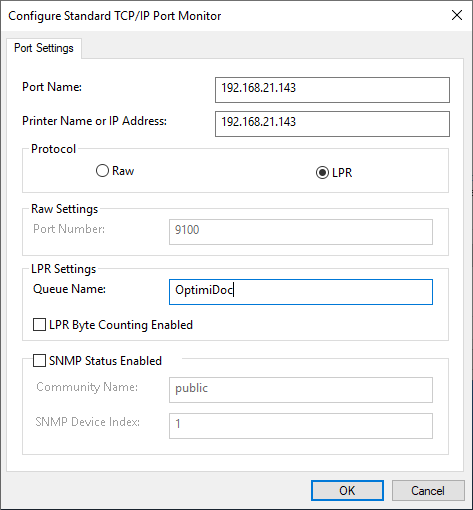
- Change Protocol to LPR and enter the queue name OptimiDoc.
Click on the OK button to continue.
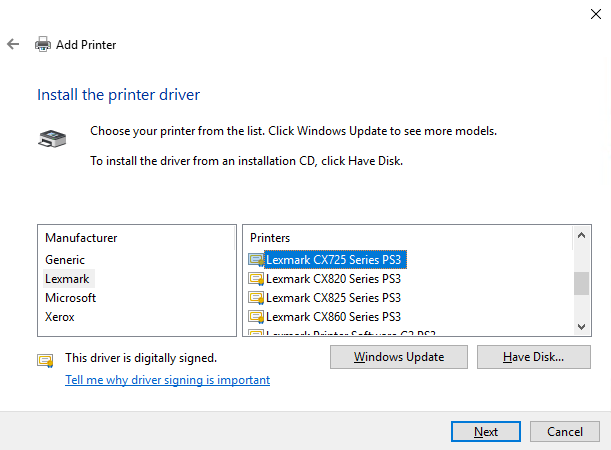
- Select an appropriate device driver from the list. If the driver is not listed, click Have Disk to browse for a driver file.
Click on the Next button.
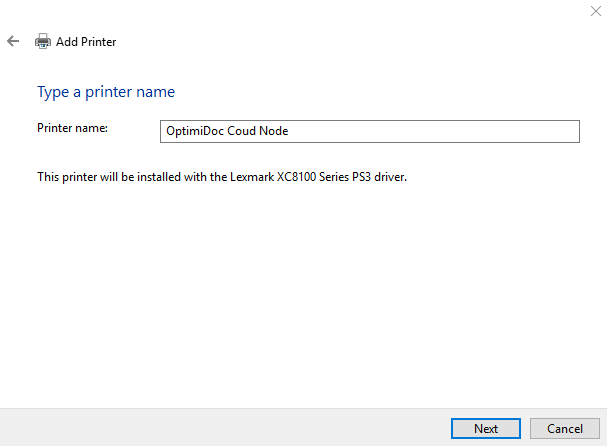
- Enter Printer name and click on the Next button.
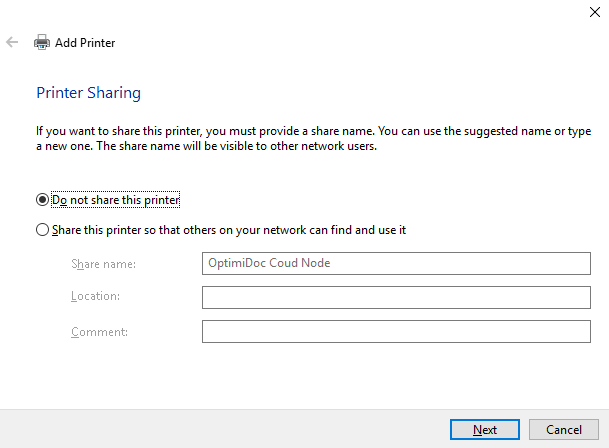
- Select Do not share this printer and then click on the Next button.
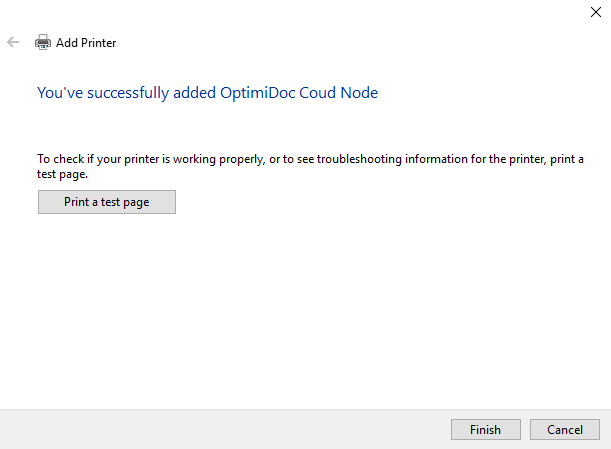
- To send a test page to OptimiDoc, click on the Print a test page button to confirm the printer installation by clicking on the Finish button.
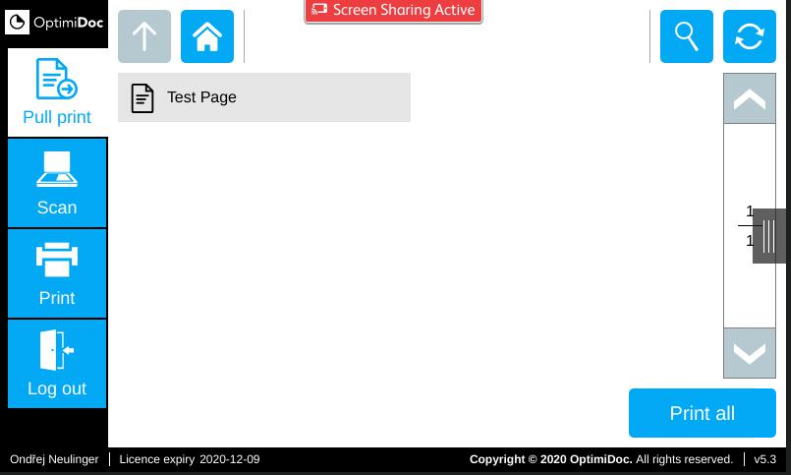
- Optionally you can check the status of the print job by checking Pull print queue. For doing this you need to have your Identification number correctly set in the OptimiCapture application in your Device. Check chapter Devices for more information.
To configure quick add-on printer:
Where local network policies allows, you can add the printer via Windows Discovered devices. This brings the comfort of quick printer add-on without further configuration needed, however within the "Printing preferences" set up for such driver, there are some limitations in advanced configuration.
